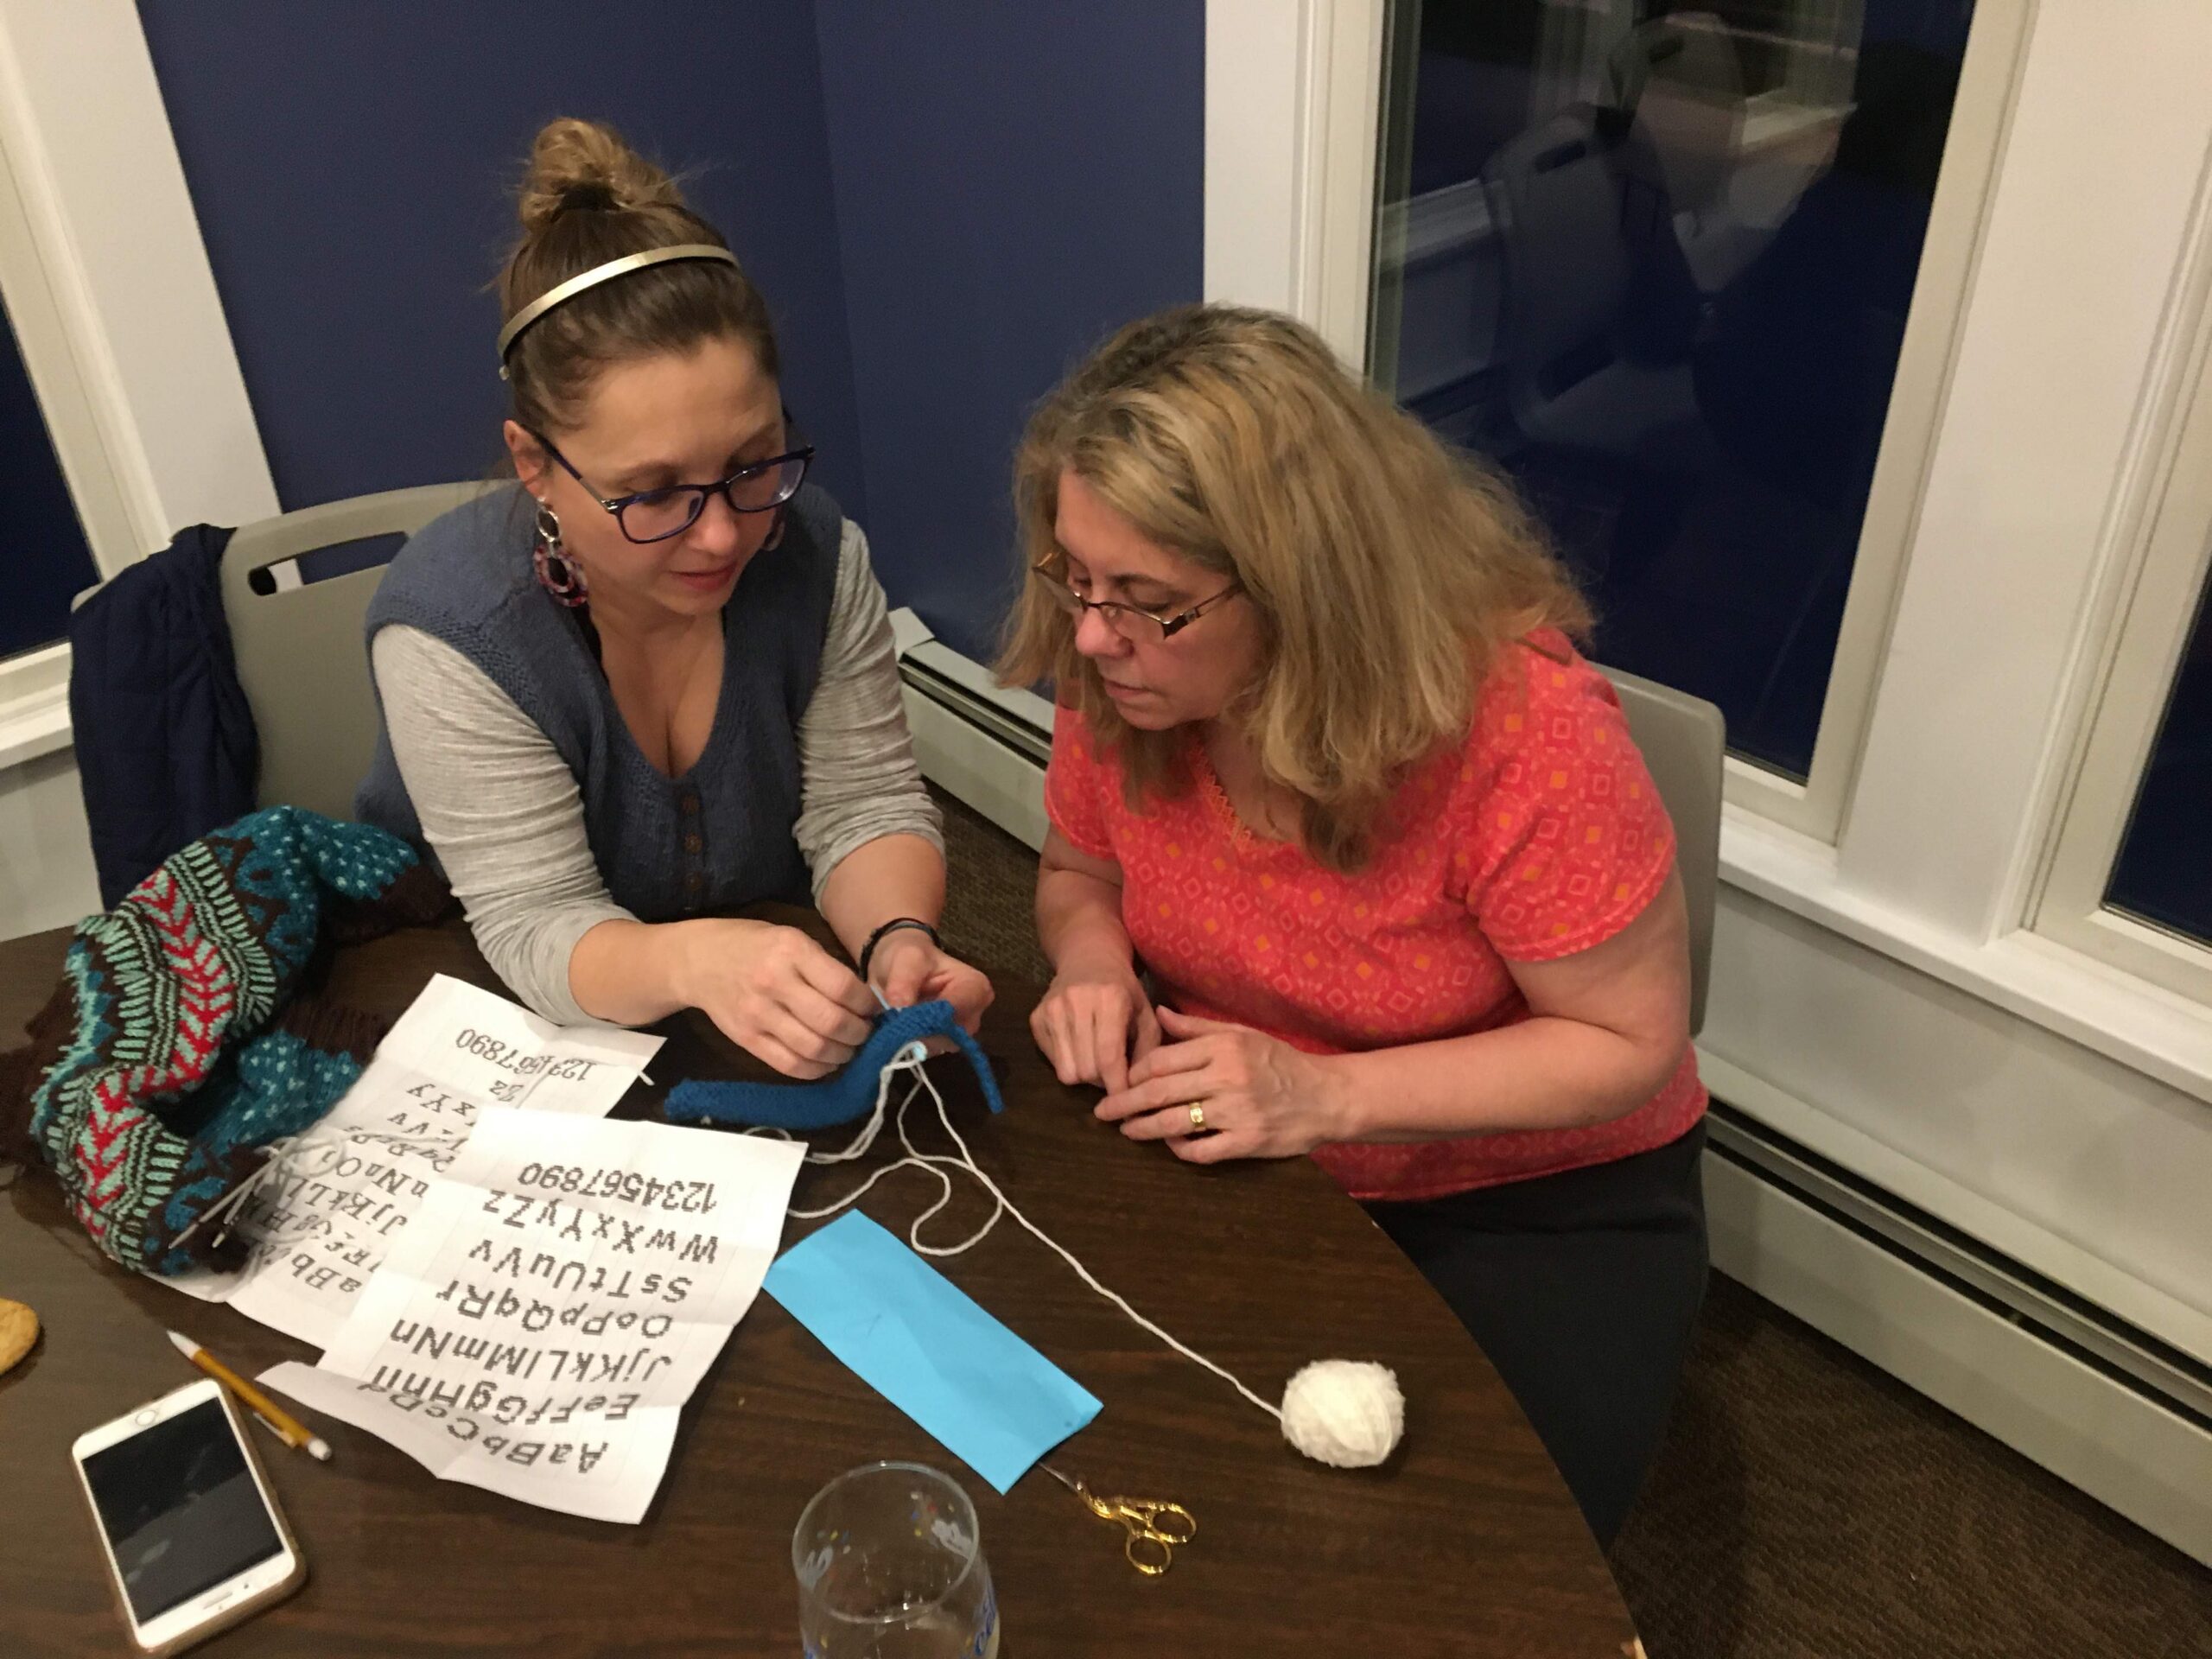
Help with your knitting and crocheting is available at all guild meetings – just take a seat at the Help Table.
At other times, you can send your questions – and any tips you want to offer others to helptable@rochesterknitting.org.
Or ask the community on the Fiber Arts Help Line thread on our Discord Server.
Tips from the Help Table
by Debby
- The tool no knitter should be without
- 2 Strands Together
- Joining in the Round
- Tightening Interchangeable Needles
- Comparing Yarn Gauges
- SSK Shortcut
- Taming your Tails
- Think Tink
- Avoiding Yarn Chicken
- The Measure of a Hand
- Decorative Decreasing
- Short Row Ornamental Decrease
- Looser Edge Stitches
- Stringing You Along
- The Voices in my Head
- On the Border
- A Dye Disaster
- Fair Isle Friend
- Frog or Fudge
- Tools
- I Hate Charts
- Out with the Old, In with the New
- Your Best Knitting Friends
- More Knitting Friends
- How to Knit the SSK
- On the Border
The tool no knitter should be without
The Tunisian crochet hook, in particular: the Knit` Pro interchangeable Tunisian crochet hook. That is what I use, together with my Knit Pro interchangeable Needles
3 Reasons I Love them
1. Like any crochet hook, they are an antidote to disaster. Use them to catch dropped stitches, and relink them quickly and safely. The hook is cut a tiny bit deeper, for better hold.
2. You can use them for cast-ons and cast-offs. I generally use the Imitaton I-Cord Cast on and Cast Off. Again, this is something you can do with a regular hook, or even a knitting needle.
3. But here’s where they really shine. If you have to pick up 400 stitches from the edge of a shawl, you will appreciate their attachment to the cable. You have the convenience of the crochet hook and the length of your circular.
2 Strands Together
I asked a friend if she wanted something knit; she
requested sox for hubby. Now, hubby is holding his own
against colon cancer and Alzheimer’s, she said, but his
feet are always cold. That seemed urgent, and haste was
essential. So, heavier gauge for speedy knitting. Not
having worsted weight sock yarn, I decided to use 2
thinner sock yarns held together.
But what about gauge? Of course, one should always
knit a swatch (tee hee), but here’s how to start. The
quickest method is to combine the separate gauges and
divide by 3. So, 2 * 7 st./in = 14; 14/3 = 4.66 st./in. So,
worsted weight-ish.
Or suppose you need a bulky weight yarn, but you only
have worsted. 2 * 4.5 st./in. = 9; 9/3 = 3 st./in. Voila!
Bulky!
There are more precise methods, which I hope to detail
in a future column. ‘Til then, happy knitting! (and
crochet!)
Joining in the Round
When knitting a pattern in the round, you are always told, “Join, being careful not to twist.” Easier said than done. I use a plastic safety pin to pin the first and last stitches together before I knit the next round. Not only does it keep the stitches straight, but it also reduces the large gap between the two stitches.
Tightening Interchangeable Needles
I love interchangeable needles, but even when they are tightened to the max, they still come untwisted, and then the stitches get stuck in the gap.
If you have this problem (A), here’s the solution: Get dental wax (B), and pinch off a small piece. Roll it into a small cigar-like shape, and insert it into the female end of the cable or needle (C). Continue filling until the wax is even with the top (D). Then screw the needle tightly to the cable, and the problem should be solved.
Note: if you have too much wax, scrape the inside
with a paper clip to remove the excess.
Comparing Yarn Gauges
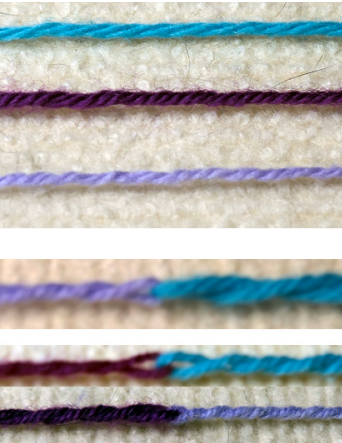
If you want to use several different yarns from your stash, you need to know if the yarn gauges are similar. As you can see from the photo, it’s hard to tell the relative gauges by sight alone. To check before you even need to knit test swatches, you can give your yarns the “twist test.” Take each yarn, double it around the other, and twist both in the same direction, as in the photos.
It’s easier to see which yarns are thicker and which are thinner. To make extra sure, run the twisted yarns between thumb and forefinger, and you should be able to detect any differences.
SSK Shortcut
I love knitted mesh patterns, but I hate SSK (slip, slip, knit) and S1K1PSSO (Slip 1, knit 1, pass slip stitch over), because they take too long.
My workaround when I am knitting projects like Reyna or Easy Peazy Shawl 2.0, is to change the stitch mount, which is the way the stitch sits on the needle, front or back leg pointing to the front of the needle.
Normally, you want both knit and purl stitches to be mounted the same way. But if I see a long stretch of SSK coming up on the right side, I purl the previous row wrapping the yarn in the opposite direction from normal. Then, when I turn the work, the stitches are ready to be knit together through the back loop. No slipping; just knitting.
Now, this doesn’t work for fancy lace patterns, where you have to know exactly where you are in your knitting, and it takes practice to change your stitch mount, but for mesh knitting, once you have it down, it can speed up your knitting by reducing the manipulations you have to make.
If you would like to see a demonstration, please visit me at the help table.
Taming your Tails
How many times have you accidentally knit a row with a tail from your cast-on? I’ve done it enough times to make a habit of tying that long (and sometimes not so long) tail in a knot before I start stitching. If you need that long tail for seaming later, you’ll want to make sure that it doesn’t get tangled or frayed, too.
I fold the left tail in quarters, then tie it in a knot. On the right side, I fold it in thirds. You’ll figure out what works best for you based on the length of the tail.
It’s an easy, practical habit to develop. You might not even
notice if it helps you, but you will notice when you’re
tinking because that long tail was untamed.
Think Tink
Tinking (undoing knitting stitch by stitch) is no one’s favorite stitch, being how it demands attention and coordination, while still being tedious. But tink we must, to remedy mistakes. So here are a couple of tips to lessen the pain.
- Always keep a long (32″ inch or longer, circular needle with a small size. I like a bamboo size 0. They’re fragile, so if you prefer a sturdier choice, stainless steel needles work. They also comes in sizes below 0. I have them up to 6-0 at home, although 4-0 needles are as small as I ever use. Whether you’re tinking or frogging, the small diameter of the needles makes it much easier to pick up stitches.
- Bamboo vs steel? If you are working with a slippery
yarn like silk, you’ll want the bamboo to hold the
stitches on the needle. If it’s a fuzzy yarn like mohair, the steel needle will slide better through the stitches. As always, it’s your preference – there are no knitting police.
Avoiding “Yarn Chicken”
If you’ve been knitting for a while, you might well have
played “Yarn Chicken”. With just a few rows left to go,
you’re not sure if you have enough yarn to finish. So
you hold your breath, and keep knitting.
But what if your uncertainty tolerance is low? Is there a
way to know?
There is. But I keep mine in the kitchen, not in my
knitting bag. It’s my kitchen scale, which weighs in both
ounces and grams.
With the scale set to “grams,” you first weigh the
remaining ball. Then knit one row, and weigh the ball
again. Now you know the grams per row. Then, it’s
grams per row times number of remaining rows. If the
product is more than the remaining yarn, you will need
more yarn. If it’s close, knit tightly to give yourself the
best chance, or reduce the number of rows. And if the
remaining yarn is more than enough, you’re good to go
worry-free.
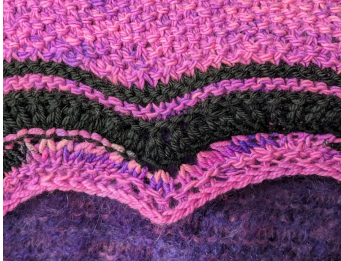
The photo shows one such project. I needed 2 rows of
398 stitches each. But did I have enough yarn for two
whole rows? (Yarn used doubled, pulled from both
ends). My scale said no. But I had enough to cut one
strand, and pair the other strand with a strand of a
matching yarn. It was the scale that helped me figure
out how to finish my shawl undetectably.
The Measure of a Hand
If The pattern tells you to knit K1P1 ribbing for two
inches, but your tape measure has been swallowed up by
your knitting bag, and you have no place to lay the item
flat. But if you don’t need perfect precision, you have no
problem.
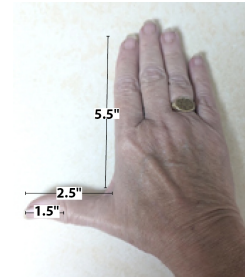
No problem, that is, if you’ve measured your hand. As the
accompanying picture shows, I have three measurements
that serve me well. The first is from the tip of my thumb
(not including the nail) to the middle of the knuckle. For
me, that’s a little more than 1 inch. The second is from the
tip of my thumb to the first finger. The third is from the tip of my index finger to my thumb. So when I want a quick
idea of how much more to knit, I just compare it to my
known measurements.
You can extend your measurements to the width of your
hand above the thumb joint, or to the length of your foot,
or to any part of your body that won’t change. As I said,
it’s not precise, but it’s a good approximation that can help you know where you are, and how far you have to go.
If you prefer your knitted garments smooth and perfectly
even, you can skip this month’s tip.
You’re working on the sleeve cap shaping, and the pattern
calls for decreasing from, say, 100 stitches to, say, 80
stitches after 20 rows. Okay, that’s 20 stitches decreased; 2 stitches every other row. The result is likely to be a simple, barely noticeable line when you assemble sleeve and body.
But if you want to make the decreases a design feature,
try the cable decrease shown in the picture.
Here’s a basic formula for the 2 cable decreases I like.
Instead of decreasing every other row, decrease every 4th
row. Lefties can reverse the names of the cables to get the
correct instructions. (BTW, I always leave a 2-stitch
margin before for the decrease)
Right leaning cable decrease (left leaning for lefties)
K 2, sl 2 sts onto a dpn, hold in back of next 2 sts. K next
st together with 1st St on the dpn, knit next stitch together with 2nd St on the dpn. knit across to last 6 st to… …Left leaning cable decrease (right leaning for lefties)
sl 2 sts onto the dpn, hold in front of next 2 sts.
K next st together with 1st St on the dpn, knit next stitch
together with 2nd St on the dpn. End: K2.
Short Row Ornamental Decrease
Last month, I showed an ornamental cable decrease for
shaping sleeves. Today, I want to make short row (wrap
and turn) shaping ornamental. The usual instruction for
“wrap and turn” is to wrap the yarn around the turning
stitch, and then, when it’s time to knit the wrapped stitch,
to pick up the wrap and knit it together with the wrapped
stitch. That way, the wrap is invisible.
But if you want to accentuate the shaping, all you need to
do is ignore the wrap. Then, you have a sequence of
wrapped stitches that can form a nice line.
Ps.
Crewneck Collar
For crewneck sweaters, I like to fold the collar over and
bind off by crocheting through the collar line on the
outside of the garment and the live stitch on the inside.
But how do I know where that collar line is?
Simple. Before I start the collar stitches, I knit a round of purl stitches. Then, I can make the collar as long as I
want, and when I’m ready to fold over and bind off, I have
my purl round to show me where to place the crochet
hook for every stitch. I can choose to go below the purl
stitch if I don’t want purl rows to be visible, or above if I want the purls to be an additional styling detail. I get a
nice, neat neckline either way. This also works if I am making something with a hem at the bottom of the item.
Looser Edge Stitches
Many patterns tell you to slip the first stitch of a flat
knitted item such as a shawl or scarf. It makes for a neat,
smooth edge. If you are knitting a sweater, slipping the
first stitch can make it easier when it’s time to seam the
pieces. Often, though, the pattern warns you against
making the slipped stitch too tight, which will make it
difficult to block the piece.
Happily, there’s an easy fix. Instead of slipping the first
stitch, knit it, wrapping the yarn around the needle twice.
On the return row, slip the double-wrapped stitch,
dropping the 2nd wrap. This will elongate the stitch
enough to keep the edge loose. This is especially useful if
you are knitting two row stripes, as it will give you an
elegant patterned edge.
Stringing You Along
When you are knitting mittens, or anything else that
requires a stitch holder, the pattern might instruct you to
place the stitches on a string. But when you have to go
back to knit those held stitches, they can be a bear to get
back on your needle. The string has let the stitch slip so
far down that you just can’t get the point of the needle into the stitch. Fortunately, there’s an easy fix for this. Instead of a thin string, use a thick yarn to be your stitch holder, and you’ll have no trouble retrieving your stitches.
The Voices in my Head
If you are a Beatles fan, you might know the lyrics to their
song from Let It Be, “One After 909.” Specifically,
“Move over once; move over twice. Oh, Baby, don’t be
cold as ice.”
Right now, I am making a strip afghan on my knitting
machine, and for parts of it, I need to transfer the stitches on needles 3 and 4 to the needles on 5 and six, and then transfer the stitches on needles 1 and 2 to needles 2 and 3. It’s not that complex, but it’s easy to mess up if my mind wanders. So now, in my head, I hear “Move over twice;
move over once, come on, Debby, don’t be such a dunce.”
It reminds me to move the stitches two over on the first
transfer, and one over on the second. It’s silly, but it keeps me focused on what I’m doing.
Then, there’s the “Two Color Linen Stitch Pot Holder”
(on Ravelry) that makes great hostess gifts. On the right
side of the work, the pattern is K1, Sl1 with yarn in front
of work. On the reverse side, it’s P1, Sl1 with yarn in
back of work. But as I knit along, instead of that Sl1 with
yarn in front, I think, YIF. And Sl1 with yarn in back, I
think, YIB. To me, it’s just easier to keep track of where I
am with the least verbiage possible.
The same goes for knitting brioche stitch. Instead of
Brioche K1, yo, Sl1, I say to myself, Hit it, meaning knit
(or purl) the stitch, and Hood it, meaning yo, Sl1. Again, a
minimum of instructions that makes it easier for me to
know where I am in the row.
The point of telling you this? To encourage you to find
your own abbreviations and mnemonics to make your
knitting rhythm simpler and easier to follow. Whether it’s
with a pop song, a made-up word, a nursery rhyme, or
silly expression, let your mind find the words that keep
your knitting in good order.
On the Border
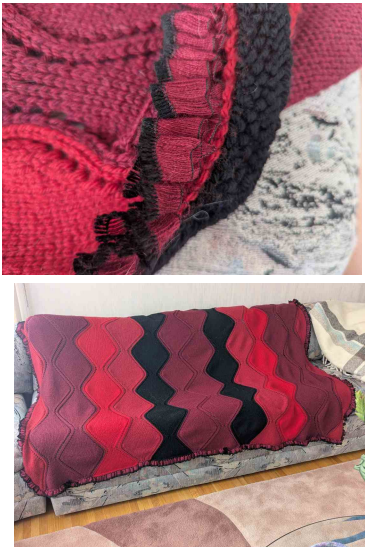
At the February meeting, I showed off my partly finished
machine-knit strip afghan. Well, I finished it, but first, I
had to solve two problems. When I sewed the strips
together, the top and bottom of the strips did not align
perfectly, and the sides curled too much. What to do?
I went to the yarn shop in my basement, and found the
perfect novelty yarn to conceal the imperfections of the
top and bottom edges. A thousand stitches or so fixed that
problem. Next, I knit a seed stitch border in black to help
control the curl. (Only took two days.)
Afterwards, the yarn being superwash, I washed and dried
it, with the results you see here.
Borders can be an easy, attractive answer when your
edges are problematic. Swatching can help, and if you
don’t care for the result, you can always frog it, and try
something else.
A Dye Disaster
I bought two skeins of gorgeous blue marled yarn at a fiber
festival, and saved them for the perfect project. When that
project presented itself–a dk weight, striped, triangular
shawl, I was delighted to pull out one skein. Not so delighted when, after soaking and spinning the shawl to block it, excess dye turned my yellow cashmere green. Fortunately, the green looked good, so I sent it on to
the recipient, who didn’t need to know the truth.
I still liked the yarn, so I turned it back into a hank, and
rinsed it and spun dried it at least 8 times. That was good
enough, and my next test swatch, which used an old novelty yarn, came out just fine. So I decided to rinse the
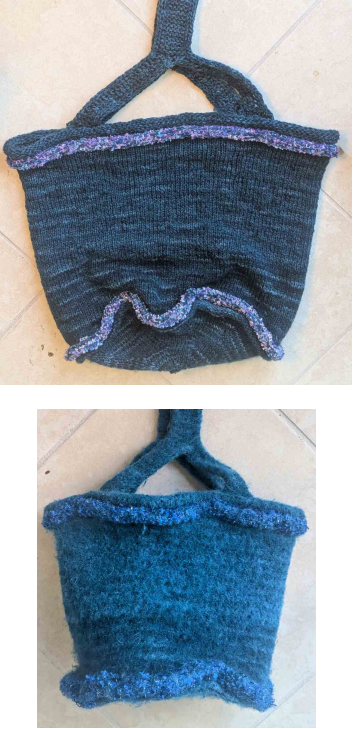
other hank as well. It did not go as planned. I knit this bag, and threw it in the washer to felt it, and as you see, the dye from that second hank turned the novelty yarn, once pink and purple, to blue. The bag was usable, but not as pretty as I hoped.
You can also see a color difference between the bottom
third and the top two thirds of the bag.
So my tip today is always rigorously test your swatch for
color fastness. I didn’t check the second hank, and that led
directly to my disappointment. Rinse, rinse, rinse until that water runs clear.
A Twisted Increase
Many a pattern, from lace to cables, calls for increases,
and knitters have their favorites. Mine is the twisted
yarn over.
Knit one front and back K1fb) is my particular
bugaboo. It tightens the stitch from which it was made,
and so introduces a design detail not necessarily
desired. If feasible, I replace it with:
Row 1: Yarn Over
Row 2: k1tw through yarnover (Twisted: “tw”)
In other words, r 1: YO; R2: K1tw.
This minimizes the size of the gap that a regular yarn
over leaves, especially if it occurs next to a slipped
stitch selvedge. Of course, it, too, creates a design
detail, but one I prefer. If you like the looser edge, you
don’t have to twist stitches at all.
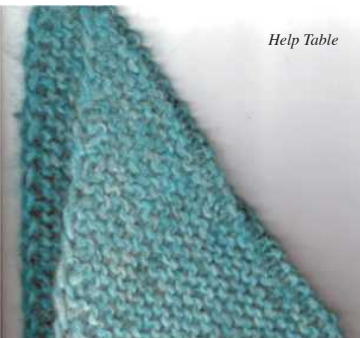
The picture shows a garter square folded into a triangle,
so as to display the invisibility of the K1tw.
The only time it doesn’t work is when it is adjacent to a
slipped stitch, as in Stephen West’s Daybreak.
Grommets: the Hole Solution
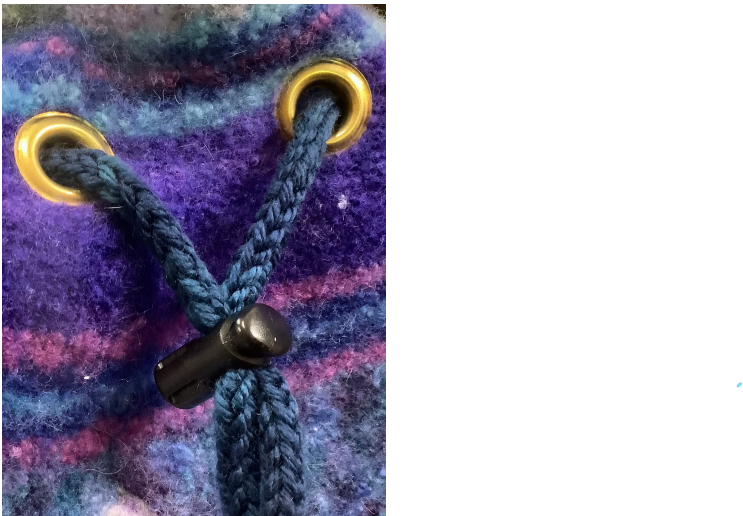
Every so often, I just have to felt something. I love to
see the giant, floppy bag turn into a compact, sturdy
bag. I usually knit a separate handle so that I can easily
replace it or adjust its length. That means I have to knit
holes along the top of the bag. It didn’t take long to
discover that the holes were susceptible to wear, and I
would have to stitch a reinforcement to keep the holes
from tearing. The problem is abrasion — the strap wears
away at the hole (and the hole wears away at the strap).
Fortunately, there’s a simple fix: grommets. A grommet
is a two-piece eyelet placed in the hole to strengthen
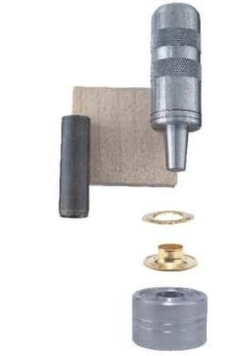
and protect against wear. One piece is a grommet
washer; the other is a washer with a neck. It requires a
grommeting tool consisting mainly of a die and an anvil
to set the grommet.
Other than the grommets themselves, the only other tool
you need is a hammer.
For your purposes, you can find a variety of grommets
and setting tools and craft stores like Michaels. For
smaller holes, there are decorative grommets in shapes
like stars and flowers. For plain ring grommets, you can
find silver and brass-toned ones in sizes like 3/8” and
5/8”. Each diameter and shape of the grommet requires
its own size setting tool, but ring grommets
come in standard sizes, so if you always use one size
grommet, it can be of any brand, and your tool will
work.
Look on-line to find good videos for grommet setting.
Grommets: they are the whole hole solution.
Fair-Isle Friend
One challenge of multi-color knitting is managing the
multiple strands. Mostly, it’s because the strands get
twisted and the gauge goes wild — too tight or too
loose.
Now, some people will hold one yarn in one hand, and
the second one in the other. That’s both picking and
throwing. So it might not work for people who are not
comfortable with one or the other. For them, I
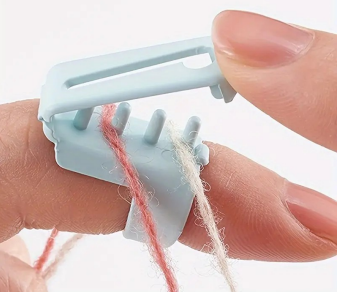
recommend a handy “yarn guide.”
If you’re a picker, it’s easy to keep your yarn in order:
first you work the with the color closest to your finger
tip. Next, you work with the next color, always picking
over the top of first yarn. The yarn never gets twisted
and you easily control the knitting tension.
If you’re a thrower, you take your first color from the
wrist end and the second from the fingertip end
The yarn guide works for purling, too, and a plus is
that you can actually use up to four different strands.
On a personal note, I rotate the guide to point the hinge
toward my finger tip, because the plastic ring is snug.
Of course, your choice.
Like much of knitting, there’s a learning curve, but
practice makes perfect. And if you need clarification,
or a demo please wander over to the Help Table. I’ll be
glad to help out.
Frog or Fudge
You might have heard that there are two knitting
stitches: knit and purl. I say there are two more:
frogging and fudging. Frogging comes from the sound
frogs make: “Rip-it, rip-it, rip-it”. And fudging, well,
that means doing something to conceal, but not cure, a
knitting mistake.
So when you see a mistake, which repair option should
you choose? Do you frog back to the mistake, or save
yourself the time and effort by fudging?
Here are a few factors to guide your decision. Is the
mistake fatal? Will it always be visible or throw the
pattern off? An example could be a dropped stitch in
the middle of a lace motif. Left unfixed, this type of
problem can result in a hole, or multiply itself with
each successive row. Sadly, frogging can be the only
way to repair it. Trying to fudge it might make the
problem worse.
Is the mistake trivial? Say, an extra stitch in a row? If
you can simply knit two stitches together, then fudging
is fine.
Are you a perfectionist? Will even a small error drive
you crazy? Frog it. You will never be proud of work
that doesn’t meet your standards. Worse, you will
likely feel the need to point out the mistakes to people
who would never otherwise notice.
Are you on a deadline — is a friend’s special event
imminent? If both alternatives are equally accessible,
which will take the least time?
Did you use lifelines? Sometimes, that means that if
fudging doesn’t work, you can frog without worry
about dropping stitches.
Are you willing to take risks? If you are a careful
fudger, the risk can pay off with savings of time and
effort.
The more you knit, the better able you will be to judge
which option is the right one for the specific problem.
If you are uncertain, don’t be afraid to ask a fellow
knitter for advice.
In all cases, remember the Zen of Knitting: Some days,
you knit; some days you tink; some days, you drop
your knitting back into your project bag, and pick up
the chocolate.
Tools for your Knitting Bag
I never take my knitting without my basic knitting tools.
I don’t mean knitting needles; I mean the accessories
that can be necessaries.
These include:
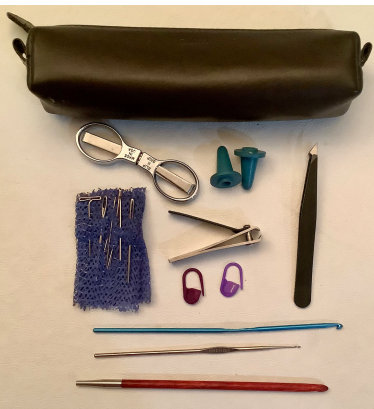
Tapestry and sewing needles. If you need to place
stitches on waste yarn, the tapestry needle is the way to
go. It’s also essential for Kitchener stitch and mattress
stitch.
Crochet hooks. Crochet hooks are great for picking up
dropped stitches. My wooden crochet hooks are
interchangeable, which makes them really handy for
picking up stitches along an edge, and for binding off.
As you can see, I have three sizes, which increase their
usefulness.
Tweezers. Every so often, I just need a pair of tweezers
Nail clipper. If you have rough fingernails that snag your
knitting, you will be very glad to have a good nail
clipper in your bag.
Folding scissors. You can take them on an airplane, and
I’m sure you know how and when to use them.
Locking stitch markers. I prefer these to ring markers,
because they will work for stitch and row marking.
Point protectors. No matter how carefully I push my
knitting back onto the needles, somehow they always
manage to slip off. Point protectors are insurance against
knitting disaster.
Knitting pouch. To hold all my tools. I had a purple one,
but it did not close tightly, so I often found my tools at
the bottom of my handbag. This brown one, while not
my favorite color, zips tightly. So far, no disasters.
You probably have a few tools that you like to carry as
well. Find a way to carry them with you wherever you
take your knitting, and you will be a happier knitter.
- Tapestry and sewing needles. If you need to place
stitches on waste yarn, the tapestry needle is the way to
go. It’s also essential for Kitchener stitch and mattress
stitch. - Crochet hooks. Crochet hooks are great for picking up
dropped stitches. My wooden crochet hooks are
interchangeable, which makes them really handy for
picking up stitches along an edge, and for binding off.
As you can see, I have three sizes, which increase their
usefulness. - Tweezers. Every so often, I just need a pair of tweezers
Nail clipper. If you have rough fingernails that snag your
knitting, you will be very glad to have a good nail
clipper in your bag. - Folding scissors. You can take them on an airplane, and
I’m sure you know how and when to use them. - Locking stitch markers. I prefer these to ring markers,
because they will work for stitch and row marking. - Point protectors. No matter how carefully I push my
knitting back onto the needles, somehow they always
manage to slip off. Point protectors are insurance against
knitting disaster. - Knitting pouch. To hold all my tools. I had a purple one,
but it did not close tightly, so I often found my tools at
the bottom of my handbag. This brown one, while not
my favorite color, zips tightly. So far, no disasters.
You probably have a few tools that you like to carry as
well. Find a way to carry them with you wherever you
take your knitting, and you will be a happier knitter.
I Hate Charts
A knitting chart is a simple, compact yet comprehensive
presentation of a complex knitting pattern.
So why do so many people hate them? Because so many
pattern charters are ignorant of the principles of
readability. I once told a well-known knitting
designer that her design was very hard to read, and she
said that it was to give the knitter an overall view of the
pattern. I pointed out that that’s what a good photo does,
and that even though the chart is presented in 2
dimensions (rows and columns), it is knit solely in one
dimension (rows), and in the end, she understood.
Let’s go through a few of the visual errors that make
charts so hard to follow.
- Grid lines and symbols of the same visual weight. It’s
hard to differentiate the instructions from the background
if both are the same line weight. Better to make the grid
lines much lighter, so they don’t impede eye movement. - Undifferentiated rows. Sure, most charts number the
rows, but it’s easy to lose track of which row you’re
working on if one row looks like the next. Better to
present rows with alternating, light background colors.
Some people use rulers to help find their way; I use light
color highlighters on every other row. - Long stretches of knit stitches that require the knitter to
count the stitches in the chart before knitting the stitches.
Easy to get wrong. One solution: place a number in the
center stitch to indicate the stitch count. - Unnecessary symbols. In my professional opinion, a
knit stitch, as a default, needs only an empty box in the
grid. That makes it easier to detect a change of stitch. Any
other symbol just adds to visual clutter. - Unintuitive symbols. Does “B” mean “place bead” or
“knit through back loop”? Does “*” mean “purl” or
“place bead”? Yes, they will be explained in the chart
legend, but that often means shuffling pages to find that
legend.
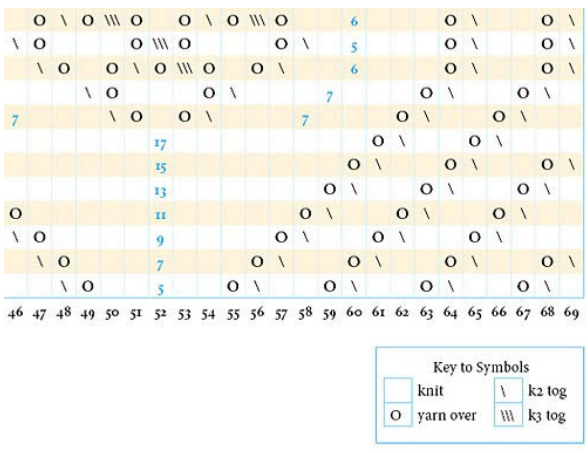
When presented with poorly designed charts, I often redo
the charts myself, using a spreadsheet program like
Microsoft Excel, or a desktop publishing program like
Adobe InDesign. You can see a snippet of such a chart
below. Now, as a left-handed knitter, I read the pattern
from left to right, and reverse the symbols for knit 2
together and slip, slip knit.
If you have a pattern with an easily read chart, you’re
halfway done. If the chart is a mess, you can fix it to
some extent with the tips mentioned here.
But you can also contact pattern designers to ask for the
improvements that will make you love charts.
Out with the Old, In with the New
Do your New Year’s Resolutions usually include organizing your yarn stash? That [room] [closet] [basement] where your yarn basks in all of its happy glory?
Mine, too. And I usually wind up organizing one or two plastic containers before my energy level takes a dive. I come across yarn I forgot I had, and yarn I decided long ago that, after knitting with it, I would never use again. Worse, I have dozens of label-less fragments whose fiber content is a mystery.
But it’s hard to get rid of it. It’s too much to toss. Or, it’s too pretty. Or it’s souvenir yarn from Hawaii. But it must be dealt with, and for that, RKG is a godsend.
Now, for the hard part: how can you detach from yarn to which you were once, and probably still are attached?
For me, it’s getting easier because I have reached SABLE (stash acquired beyond life expectancy). So, in rare moments of rationality, I can look at a yarn whose charm has long worn off, and ask myself, “Am I really going to use this? Really? When?” And if the answer is “Never,” then “Hello, Rochester Knitting Guild”.
The Guild has two great avenues for donation: the Annual Yarn Auction, and Community Knitting. It’s just that easy. Bring in your yarn. Leave it at the Community Knitting table. Or hand it to the Auction Chair. Speaking from my own experience, one person’s discards are another’s acquisition (Don’t tell Mr. Sensitive Baby Skin, because I’m supposed to be on a yarn diet). Last year, I donated a sweater’s worth of gradient yarns, because I thought it too scratchy. Also, some green and purple mohair boucle from the 1980s. Okay, I did come home with some ArtYarns sock yarn, but good diets have cheat days. And I did wind up with less yarn that I started with.
So, out with the old, in with the new! Happy New Year and Happy Knitting!
Your Best Knitting Friends
Whenever I need to learn a new knitting technique these days, I turn to my best friends, Aunt Nettie, and her son, Cousin Hughie. I mean, of course, the Internet and YouTube.
By now we all know about Ravelry, one of the best social media platforms in the world. It’s full of helpful advice, great patterns, a comprehensive yarn database, and lively message boards. So I won’t say too much about it, except to encourage every knitter and crocheter to become a member (It’s free).
But Aunt Nettie can help you find great tutorials and demonstrations of techniques that can enhance your projects and solve your problems.
Here’s an example. I make a hat I call “Aral,” based on a free pattern in Ravelry called Lara, that uses fur yarn for the brim and super bulky yarn for the crown. I promised a friend a blue Aral, and I had the perfect blue fur. But despite my massive stash, I didn’t have a matching super bulky. I did have a perfect worsted weight yarn. The problem? Even used double, it wasn’t heavy enough. It would work great if used tripled. I just didn’t want to use more than one skein.
Then, I remembered a technique called Navajo plying, an easy and practical method for tripling the weight of any yarn. I asked Aunt Nettie to find me a good video, and she came through instantly. Actually, she found several, so I picked the one that I thought looked best. I clicked on it, and Cousin Hughie opened it right away. I watched the demo, and tried to follow it, but it moved just a tad too quickly for me to get it right on my first try. Fortunately, Cousin Hughie has a way of adjusting the speed of videos: click on the settings icon to slow down the display. At 75% of the normal speed, I could see exactly how to get that triple-strand out of one skein.
Another time, I made an afghan from 4 triangle pieces that needed to be joined. I could have used mattress stitch, but I wanted a flatter, more decorative join. Once again, Aunt Netty came through. I don’t remember the technique since then, but Aunt Nettie does.
Want to find a knit stitch with a multiple that will fit the number of stitches in your project? Aunt Nettie will find a site that organizes repeats by count, like six stitches, or six stitches plus one.
So if you have a knitting need that Ravelry just can’t help, ask Aunt Nettie. If she can’t help, no one can.
More Knitting Friends
Does this happen to you? You wind your leftover yarn carefully into tight little balls, with the ends neatly tucked in. You place it gently in its storage container. But the next time you open that container, your lovingly tended yarn has halfway unraveled, and tangled itself into two or three other balls of equally disarrayed yarn.
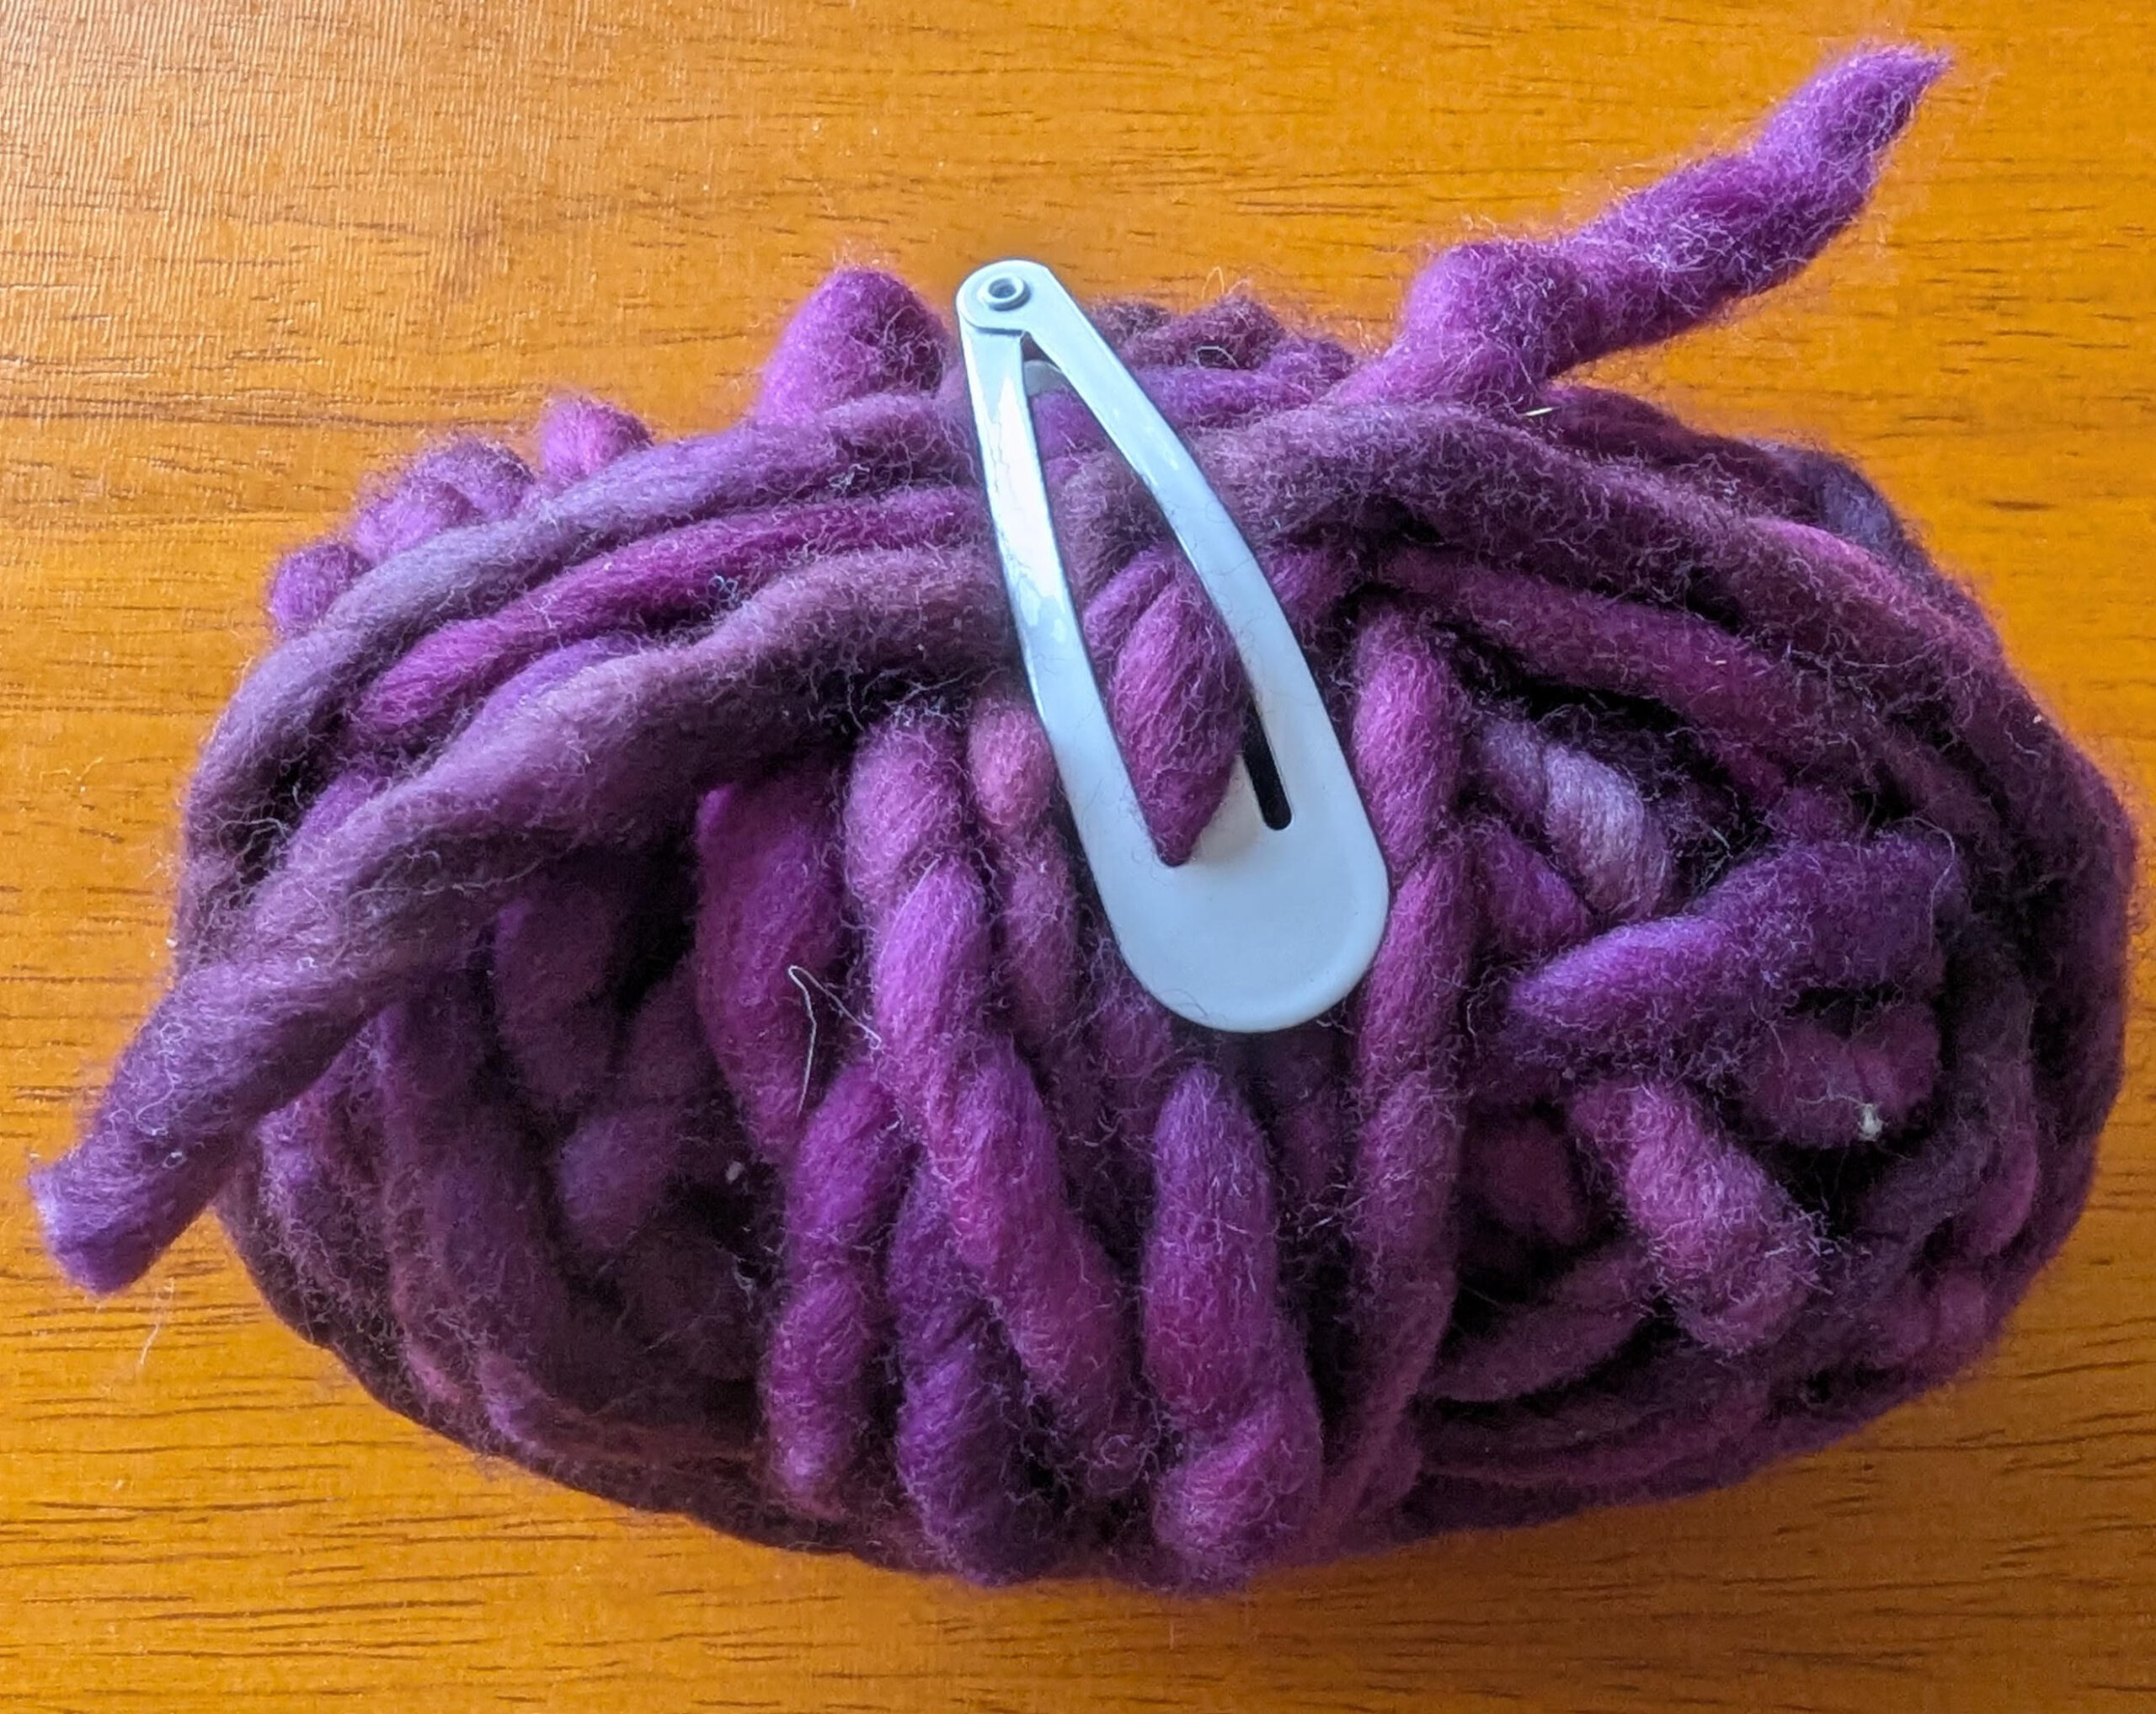
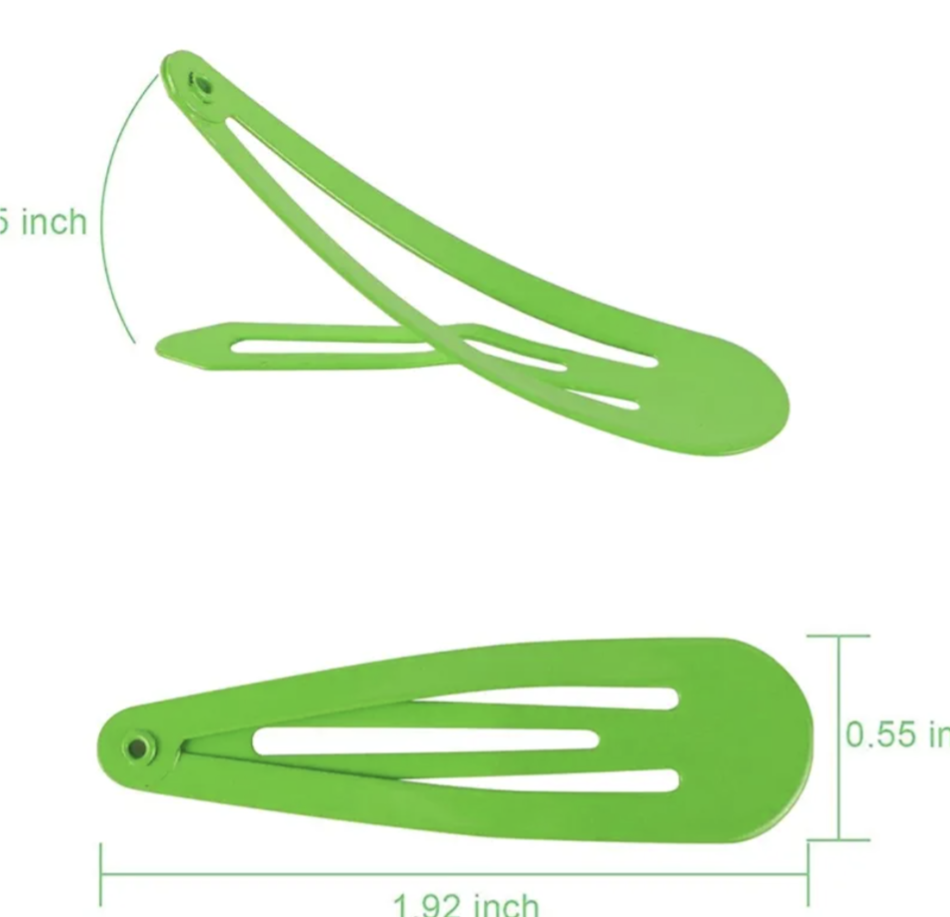
Well, Aunt Netty has a fabulous solution. Now, normally, I prefer to offer tips you won’t find elsewhere, but this one is so good, I have to share it. If you’ve never seen one, you bend it to snap it open, slide it through your hair, and bend it again to nap it closed. Apply it to your yarn ball, and no loose ends to escapeAnd they are not expensive. I paid $8 for a pack of 120 assorted color clips, which might just be enough for all of my WIPs and leftovers. Maybe. But if not, well, $8 for 120 clips is less than 7 cents a piece.
It’s snap hair clips to the rescue.
How to Knit the SSK
So here’s the first question I received: Susan Braverman asked about the proper way to knit the SSK (slip 1 stitch, slip the next stitch, knit the two slipped stitches together), noting that one source says to slip both stitches as if to knit, and another source says to slip the first stitch as if to knit, and the second as if to purl.
I explained that both were usable. The slip one purlwise would result in the stitch twisting underneath the topmost stitch, but it was “knitter’s call.”
Upon further investigation, I found a YouTube video demonstrating not two, but eight ways to knit the SSK. I couldn’t find the address for a link, but the title is “Clo knits: I tried 8 variations of SSK to find the best.”
Why so many? Because while the knit two together instruction leaves a neat slope, SSK is less tidy. It all has to with the amount of slack between the slipped stitches. Knitters have grappled with this problem for years, and various solutions have been suggested.
If you are dissatisfied with your SSKs, the YouTube video will help you find the decrease you like.
On the Border
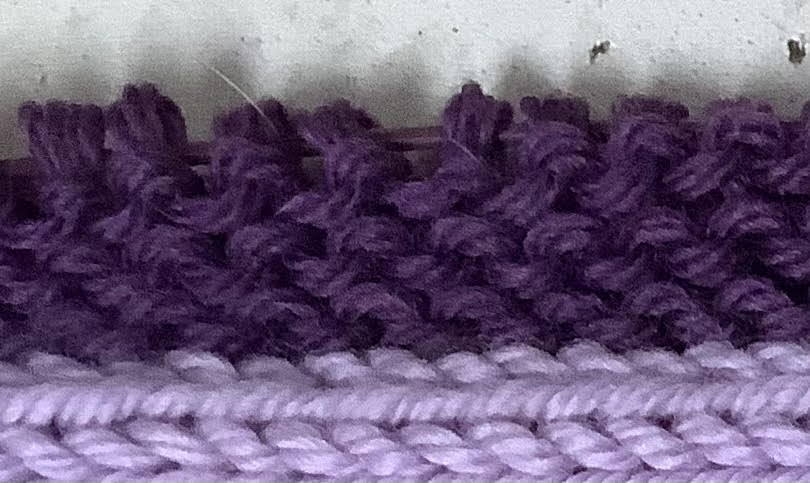
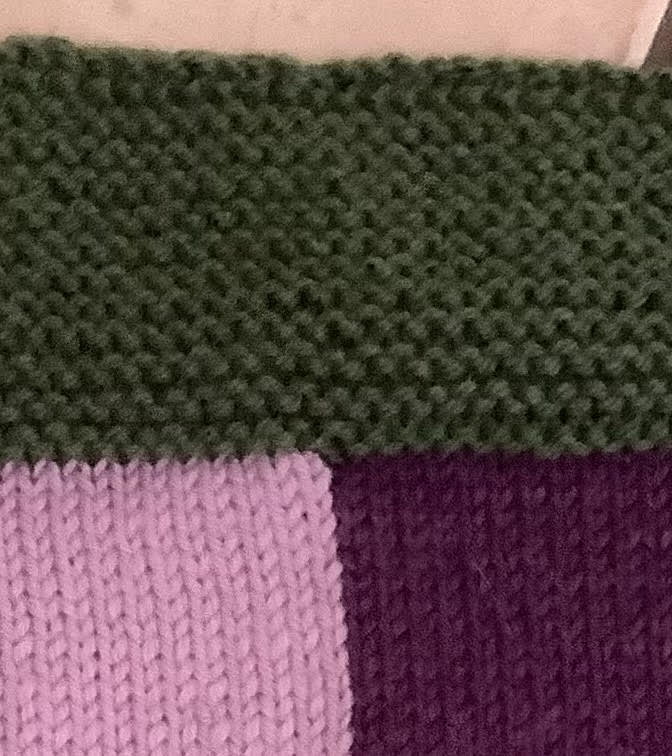
For her birthday, my niece asked me for an afghan, and I was delighted. My mistake was buying the yarn before I knew what I would make. After weeks of serious cogitation, I decided on a machine-made, color-block strip afghan. I cast on 30 stitches; 300 rows and four colors later, I had my first strip, and my first problem. I didn’t have enough yarn to fulfill my original idea, and too many colors were backordered. I found more of only 2 colors.
My niece is not yet 13, yet she is 5’10”. I can’t skimp on her blanket. My solution was to knit as many strips in the colorblock pattern as I could with all 4 colors, and use the 2 remaining ones to add a wide stripes to both ends.
But then, I finished and joined 9 colorblock strips, and realized I had enough of all four colors to frame the afghan with a modified Log Cabin border.
So, finally, we arrive at the first point of this column: how useful and attractive a border can be. It can control the curl of plain stockinette, and harmonize the various colors. The top and bottom edges are easy to do; just pick up and knit every stitch along the edge. Then, knit garter stitch rows to complete the first block of the frame.
Here’s second point: because in stockinette, a stitch is wider than a row is tall, reconciliation depends on the gauge of the yarn. For the afghan, the gauge was 4 stitches and 6 rows to the inch, which reduces to a ratio of 2/3. Thus, the pick-up sequence was “pick up 2 stitches, skip 1” to get a flat, even seam.